To use the CoSo Cloud SSO button for events to allow users to authenticate via the Gatekeeper login page when registering for an Adobe Connect event you will need to do the steps within this guide. If this configuration is not followed, it will result in the SSO button either not showing or not working properly.
- Ensure that CoSo is aware of the need to use this button. There will need to be a back end configuration change for the Events Module of Adobe Connect to allow the HTML script to be embedded within an Events Template. Without this change, Adobe Connect will strip out some of the HTML code placed on the template and disable the button’s functionality.
- Your CoSo representative will be able to either provide you with the HTML to place in an Event Template or may be able to assist by creating a template with the button on it. It is strongly recommended that you don’t edit the Default templates that come with Adobe Connect as this may affect Events that you don’t anticipate. We recommend that you create specific SSO templates for clarity and ease of use.
- If you are creating your own templates, you will need to use the Embed function.
- Then use the HTML option to put the provided code into the page.
- If you are creating your own templates, you will need to use the Embed function.
- The code will have a few items that can be edited. Find the following in the HTML to set it appropriately:
- acserver – put your Adobe Connect URL here
- gkserver – put your Gatekeeper URL here
- At the bottom of the HTML code there is an option to edit the text displayed with the button in the <h3> block.
- At the bottom of the HTML code there is an option to edit the text displayed on the button when the page is for registering for the event. Find the ‘SSO Register’ text and modify the text to display as desired for Event Registration with SSO.
- At the bottom of the HTML code there is an option to edit the text displayed on the button when the page is for logging into the event. Find the ‘SSO Login’ text and modify the text to display as desired for Event Login with SSO.
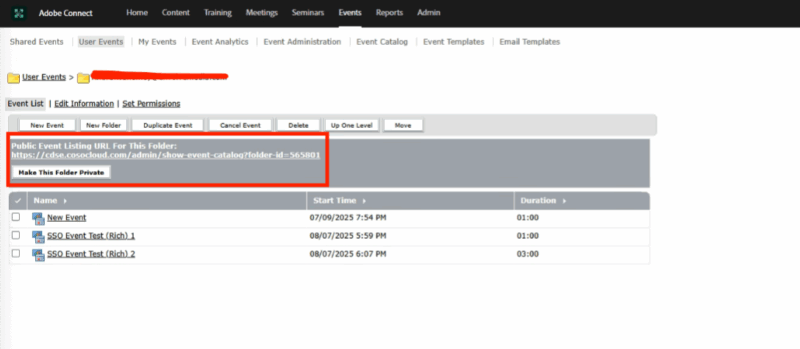
- When using the Event Templates with the SSO login option the Adobe Event must be located in an Event folder that is set to being Public. This means that the button at the top of the Events in that folder has been selected and a URL for an Events folder for Events only located within that folder is showing. This does not mean that the Events within that folder are publicly searchable or exposed publicly in any way. If the folder is not set to Public then Adobe Connect will not allow the required API calls to be made that facilitate the SSO authentication workflow.
If this step is skipped, then clicking on the SSO button will only result in the showing of the SCO-ID of the event and no further action will occur.
A Folder Set to private looks like this:
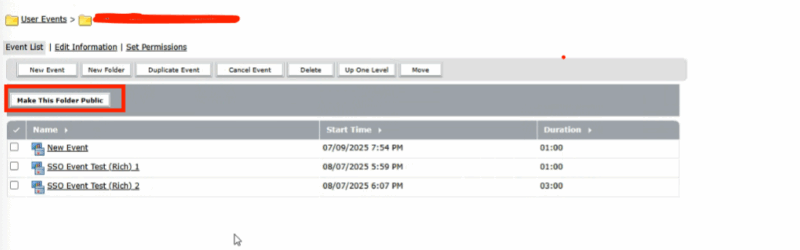
Click “Make this Folder Public” and it should look like this:
5. After the user authenticates via SSO they will return to the Event page and the Adobe Connect registration form will now show that it recognizes the user and ask them to provide any unknown fields in the registration form and confirm their registration for the event.
User clicks SSO Register button:
The user should then authenticate via the desired SSO method:
User returns to Event Registration page but the registration form shows they are logged in and user can submit their registration:
Logging into an Event with SSO
- User clicks link in email invitation or link provided by Event organizers to join. SSO Login button is available for user.
2. User should then authenticate via the desired SSO method.
3. User clicks Join Event button to join Event.