
Before you begin
To set up the Schoology LTI for Zoom, you will need the following permissions and information:
1: Administrator accounts for Zoom and Schoology. (NOTE: Your Zoom account must be a Pro/Education/Business account as they contain the REST API feature required for integration functionality. A Zoom Basic account will not work).
2: Your Schoology URL.
3: Schoology Consumer Key/Secret.
Obtaining Your Schoology Consumer Key and Secret
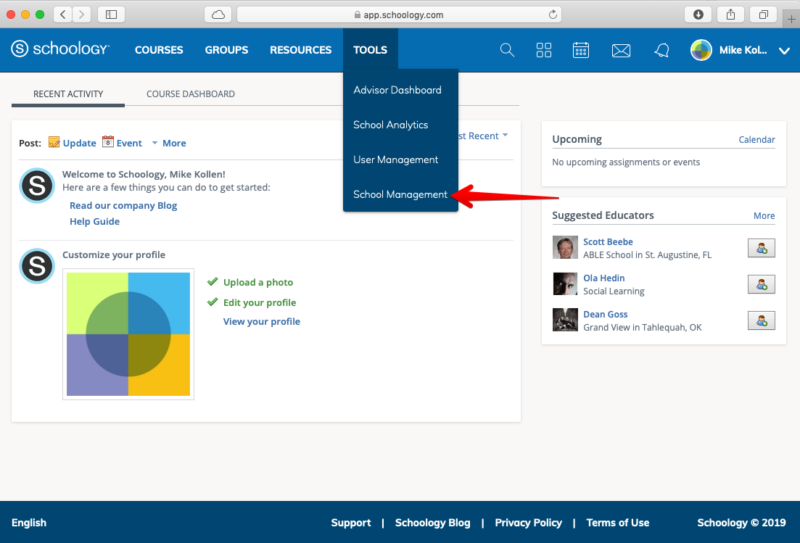
- Log in to Schoology LMS with your admin Account.
- Click Tools > School Management.
- In the left-hand menu, click Integration.
- Click the API tab.
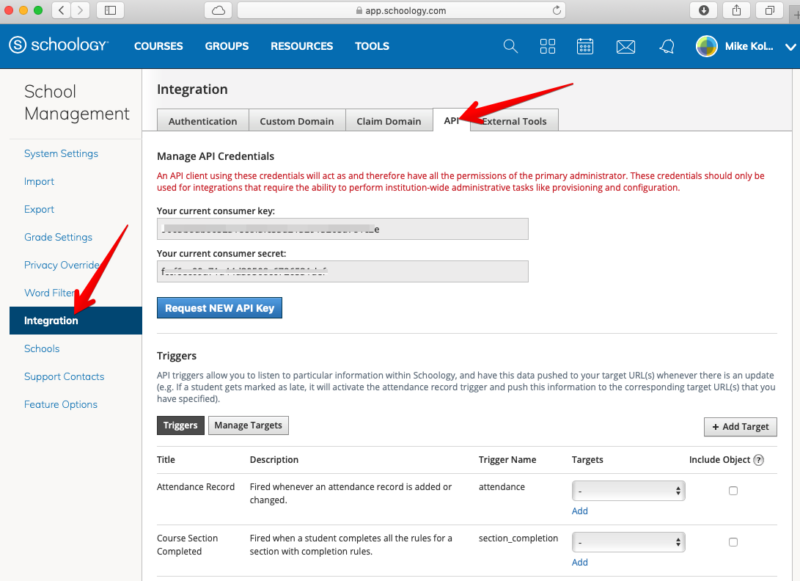
- Copy “Your current consumer key” and “Your current consumer secret” and keep them on hand.
- If you do not see your key and secret, click “Request NEW API Key.”
Installation from Zoom Marketplace
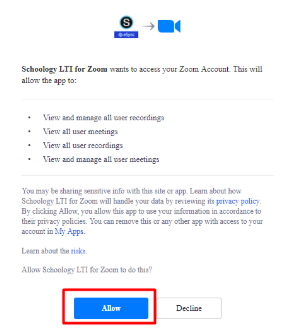
Click Install for the Schoology LTI in the Zoom Marketplace. Read through the access notification shown below, and click Allow.
Create your CoSo Cloud LTI Admin account
You will need to fill in the following form:
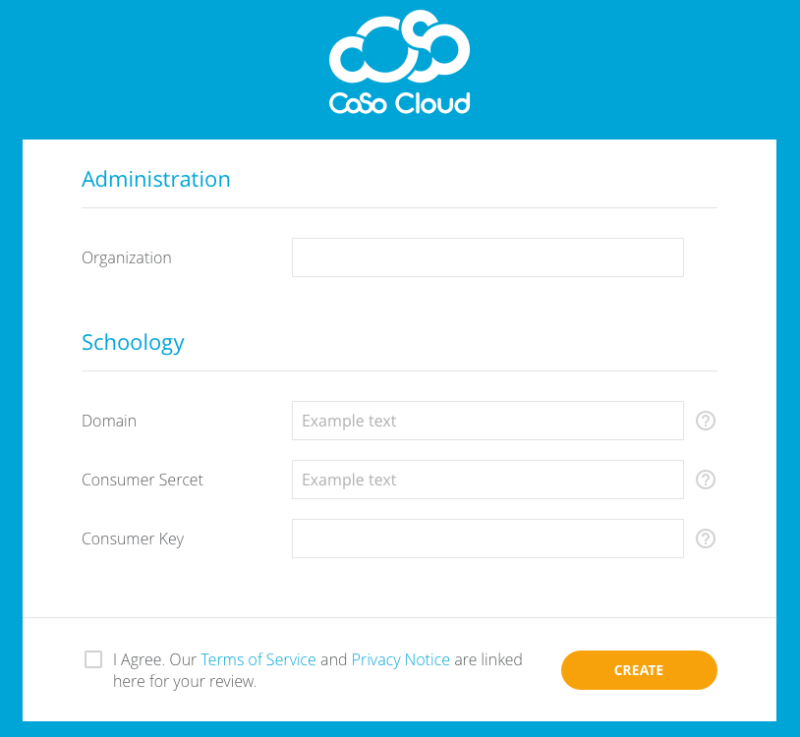
Administration section:
- Organization: Your company/organization name.
Schoology section:
- Domain: Your Schoology URL.
- Consumer Secret: Your Schoology consumer secret from the steps above.
- Consumer Key: Your Schoology consumer key from the steps above.
Please take the time to read the Terms of Service and Privacy Policy and check the I Agree box.
Click Create.
Next Steps
You will receive an email from CoSo Cloud asking you to confirm your account:
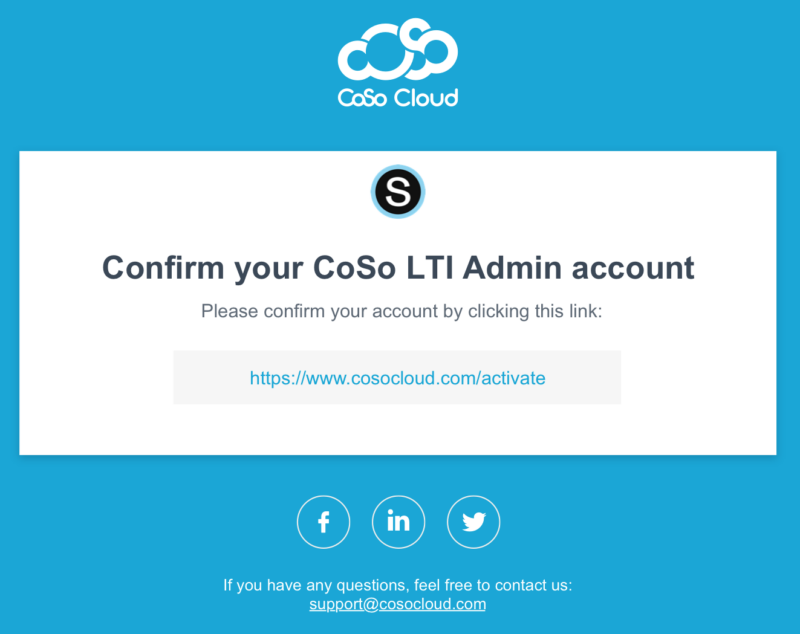
Click on the link in the email to confirm your account and login to the CoSo Zoom LTI Admin Tool.
Once completed, you’ll receive a second email confirming activation.
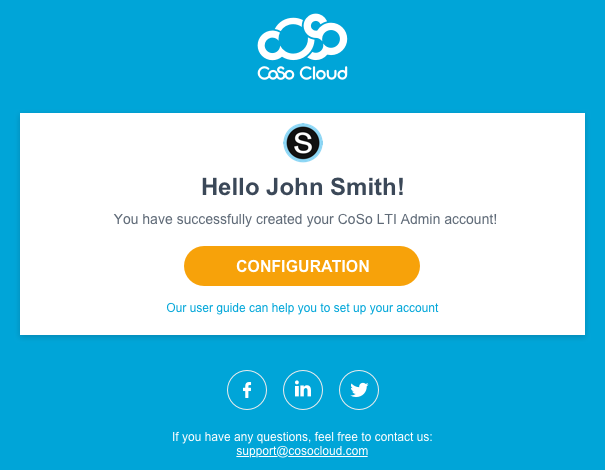
Click the Configuration button in the email to be taken to the CoSo Cloud LTI Admin app to establish an initial password.
CoSo Cloud LTI Admin
Once you have established an initial password and are able to login with it to the LTI Admin Tool (accessible at https://licensing.cosocloud.com, you can:
- See your Schoology License.
- See your Consumer Key and Shared Secret.
- Enable and disable LTI settings (Secure Roster, Study Groups, Office Hours, and Kaltura).
- Create other non-admin company users (not required).
To continue the Marketplace installation:
- In the Zoom Admin tool, click LMSs and click the Edit icon:
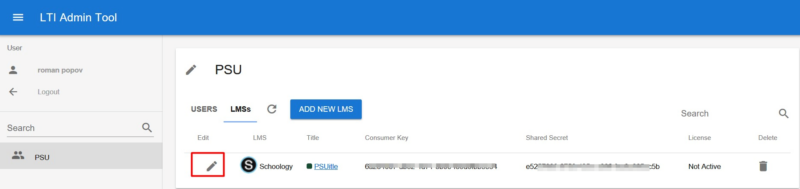
- On the General tab, ensure your LMS Domain is correct and populate the Schoology Consumer Key, and Schoology Consumer Secret generated from the steps above:
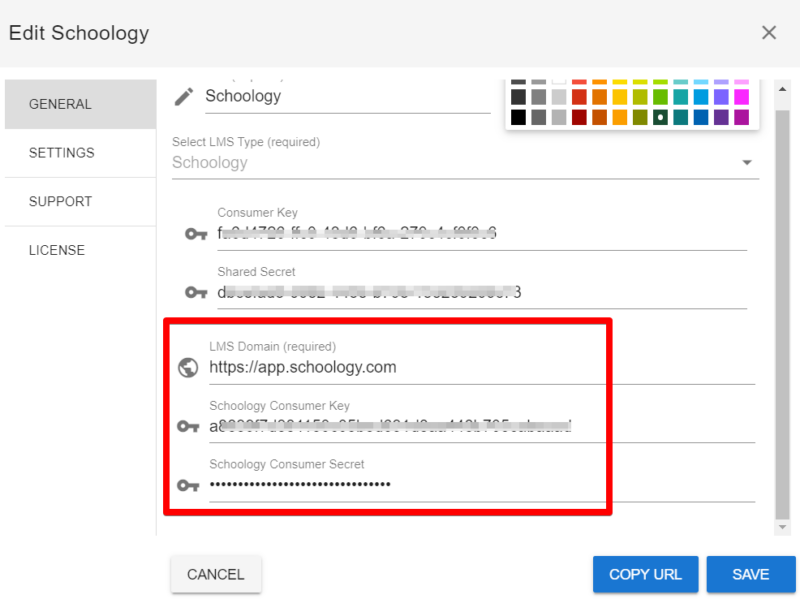
- Click Save.
Installing the Schoology LTI for Zoom
Steps to install:
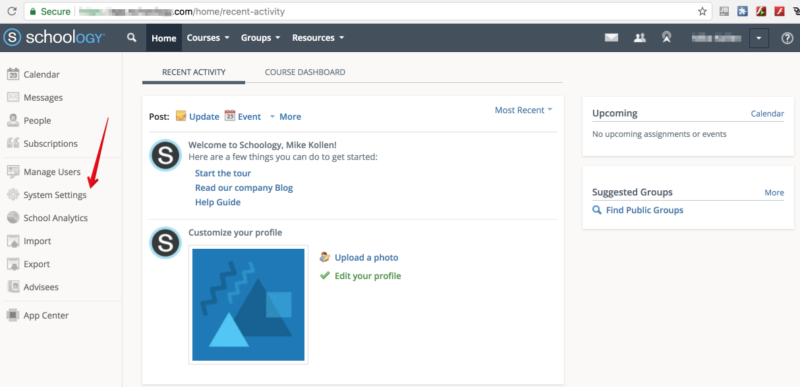
Click system settings:
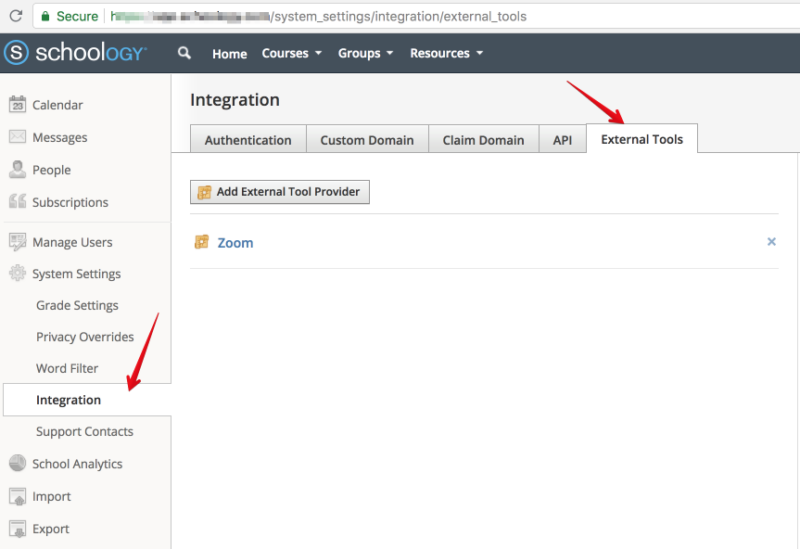
In the left menu, click Integration and open the External Tools tab:
Click Add External Tool Provider.
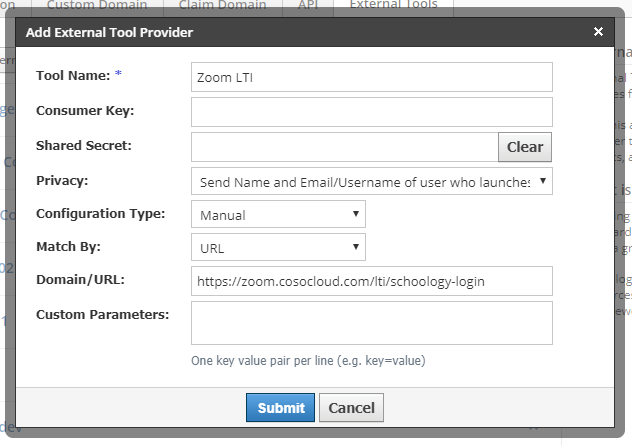
Enter the following:
Tool name: Enter the name of your Zoom Integration (example: Zoom LTI)
Consumer Key/Secret: See Key and Secret above; this is separate from the Schoology Consumer Key and Schoology Shared Secret
Privacy: Leave as is/default setting
Configuration Type: Leave as ‘Manual’
Match By: choose ‘URL’
Domain/URL: https://zoom.cosocloud.com/lti/schoology-login
Customer Parameters: Leave blank
– Click Submit.
To Add the LTI to a course:
Navigate to the Course, press the Add Materials, and click the Add File/Link/External Tool link:

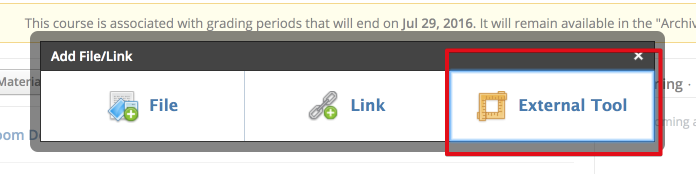
Select External Tool:
Select the created Zoom External Tool as a Tool Provider and choose a title for Zoom Integration (You can call it whatever you wish for example: Live Class or just Zoom).
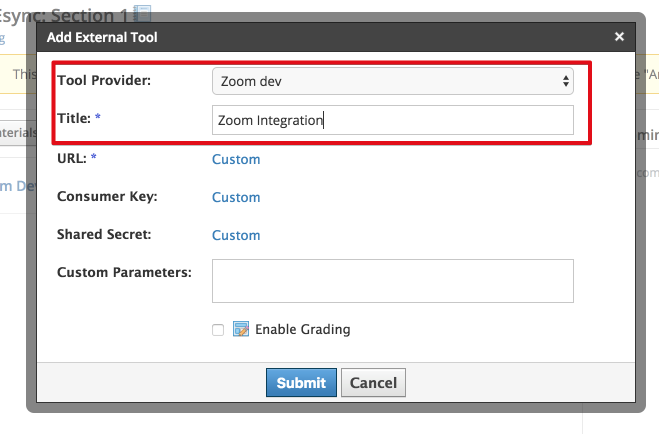
You should not have to enter the URL, Key, or Secret as they were saved in the system settings above.
When all fields are populated, click on the Submit button to finish the process.
– Click the Zoom Integration Link to load Zoom LTI:

Removing the LTI from Schoology
In the left menu, click Integration and open the External Tools tab:
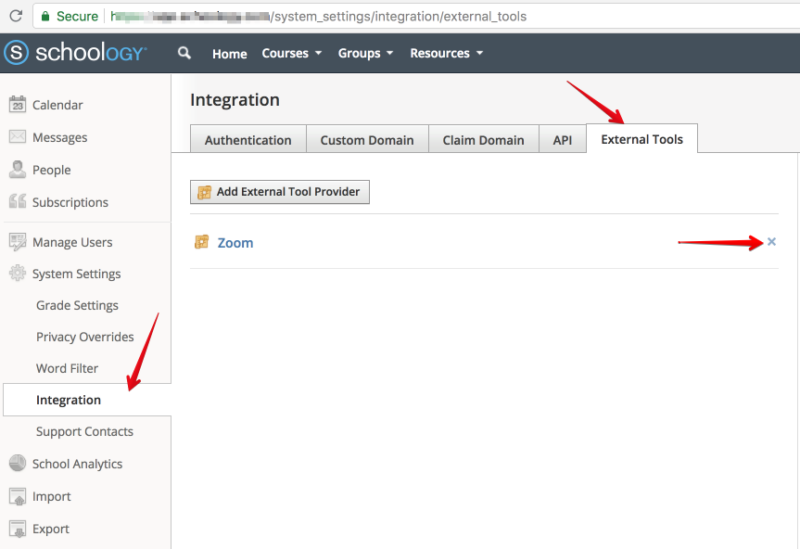
Click the X next to the Zoom LTI. When asked if you are sure, click Yes.
This will remove the LTI from Schoology and all courses.