
Installation of the LTI for Adobe Connect integration into Blackboard is simple but requires some assistance from CoSo Cloud, which is done via a pre-scheduled meeting. This guide will provide you with the items you need to move forward with the installation and step-by-step instructions to install the LTI application within your Blackboard instance.
Pre-installation Requirements
In order to install the LTI, you’ll need the following:
- An Adobe Connect login that has Administrator access*.
- Administrator access to Blackboard.
* For the Adobe Connect login, we suggest creating a “dummy” user in Connect and assigning it to the Administrators group. Using your own, or someone else’s, login has the potential to break the connection between the LTI and Adobe Connect. For instance, if your password changes or the Connect Admin leaves the company and their login is disabled, the LTI will throw a connection error. Having a “dummy” Admin login can help solve this problem.
Setting up the LTI in Blackboard with Admin Credentials.
The first part of setting up the LTI has to be done in eSync’s EduGameCloud Admin environment. An EGC user account will have been created for you by eSyncTraining. Once setup is complete, this account will allow you to update your LTI settings and check in on your license.
This part of the setup will be done via a pre-scheduled meeting with eSync. This will allow you to enter your Blackboard and Adobe Connect Admin credentials into the system via screen control without having to share them.
Once your credentials have been entered and the connection tests passed, you will be provided with a Consumer Key and Shared Secret and can move forward.
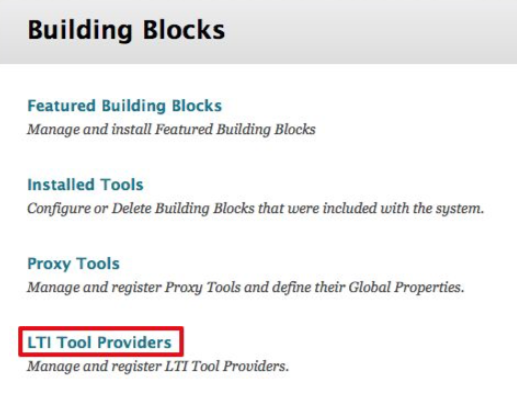
In Blackboard, navigate to System Admin > Building Blocks

Click on LTI Tool Providers:
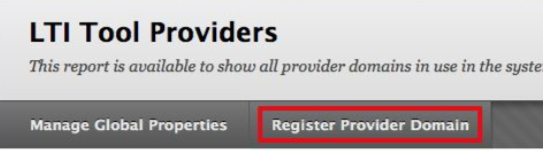
Click on Register Provider Domain:
Fill out the following:
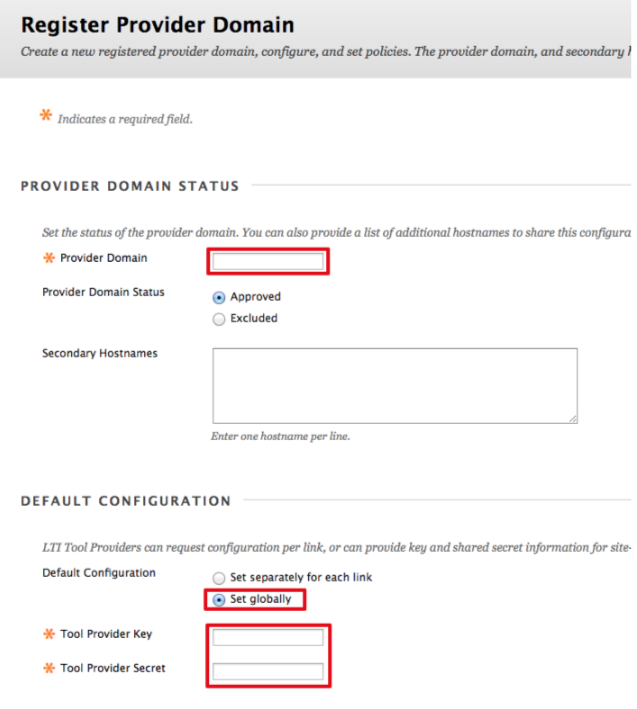
- Provider Domain: app.edugamecloud.com
- Default Configuration: Set globally
- Tool Provider Key: Provided by eSync
- Tool Provider Secret: Provided by eSync
Set the Institution/Organization Policies options as follows:

Click Submit.
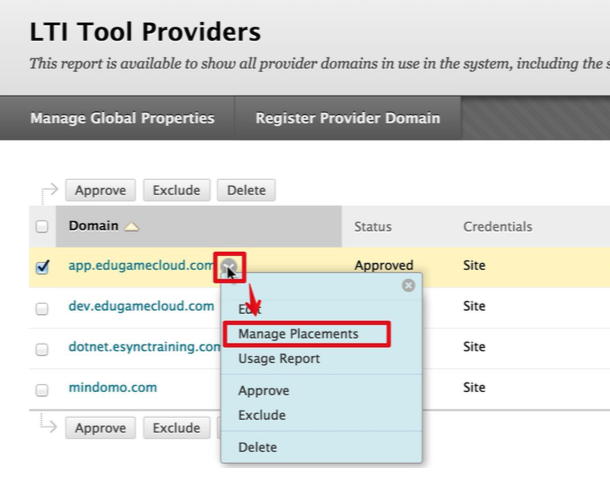
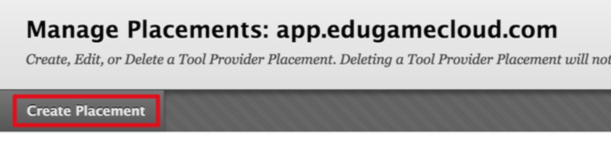
Back on the Manage Global Properties page, click on the Options menu next to app.edugamecloud.com and select Manage Placements.
Click on Create Placement.
- Label and Handle: Adobe Connect LTI.
- Tool Provider URL: https://app.edugamecloud.com/lti/blackboard-login
- Tool Provider Key: It should be pre-populated.
- Tool Provider Secret: It should be pre-populated.

Click Submit.
Navigate to System Admin > Building Blocks.
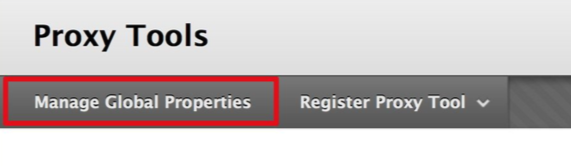
Click on Proxy Tools.

Click on Manage Global Properties.
Select the Allow Unknown Proxy Tools checkbox.
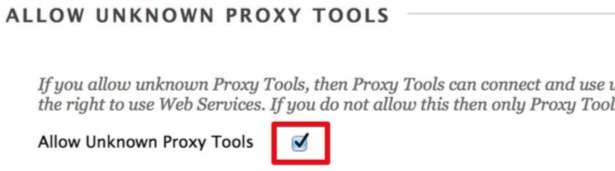
Click Submit.
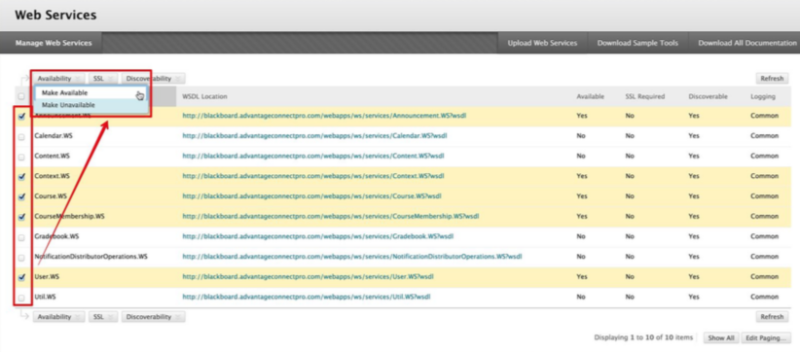
Navigate to System Admin > Web Services.

Check the following Web Services and select Make Available:
- Announcement. WS
- Context. WS
- Course. WS
- CourseMembership.WS
- User. WS
Adding the LTI for Adobe Connect to a Course
Navigate to System Admin> Course Settings.

Click on Course Menu and Structures.

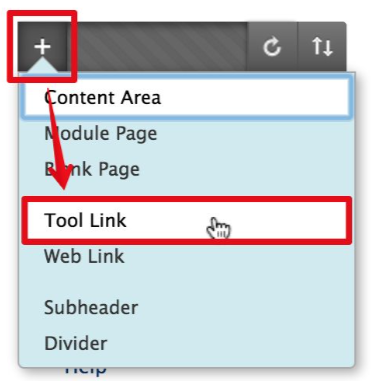
In the Create Default Menu section, click on the + icon and select the Tool Link option.
Enter a Name (Adobe Connect), and select Adobe Connect LTI from the Type drop-down menu. Select the Available to Users checkbox.
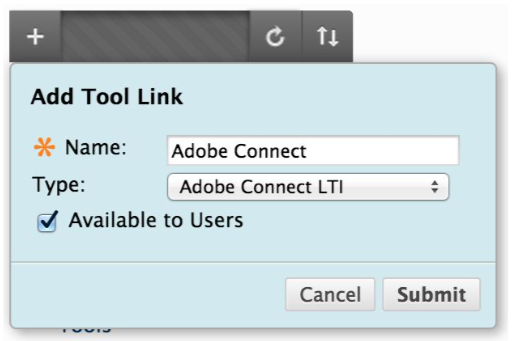
Click Submit.
In Courses, you should now see the LTI (or be able to select it from the + menu).
